At 3 am, I experienced a major breakdown when a production namespace was lost as our Jenkins pipeline using kubectl apply –force overwrote the manual hotfix that had been applied moments earlier by a team member. The push model of deploying to a cluster had failed to deliver on its promise, and this event resolved me that I would never allow a script to dictate the state of the cluster again.
That experience was pivotal for me in moving towards GitOps. I am referring to the actual pull-based reconciliation methods versus the glossy marketing slides. The pull-based reconciliation model ensures that the cluster remains in sync with Git regardless of what CI tools do in the background. As a result, I chose to use ArgoCD as my GitOps solution and have never looked back. This guide details the process I took to implement the ArgoCD platform and how I organized my repositories to accommodate multiple environments while providing a solution to the sync loop problems that nearly drove me insane.
Quick Summary
- How the pull-based GitOps model actually works and how it eliminates push-based drift.
- How to use ArgoCD for Kubernetes GitOps synchronization from raw manifests to Helm.
- How to design your repository layout so that you can keep your application code separate from your environment configuration, thereby avoiding re-deploys just to modify resource limits.
- How to use RBAC to integrate ArgoCD with Active Directory so that platform teams do not share a single administrator password.
- Solutions for infinite sync loops, extraneous field noise, and how to automate rollback processes without creating over-engineered solutions.
The Shift to Declarative Kubernetes Deployments with ArgoCD
The Pull-Based Architecture Model
In a push pipeline, your CI tool executes `kubectl apply and crosses its fingers as far as whether it will be successful with that command. The command is executed one time only, if there are any changes made to the deployment object by someone directly through the kubernetes UI after that, changes remain in effect until the next push of the pipeline updates the initially deployed state. As a result, the deployment of the application will appear to be an ad-hoc creation of clusters or environments, which makes it difficult to track or troubleshoot issues related to application state, which can become an ongoing forensic investigation.
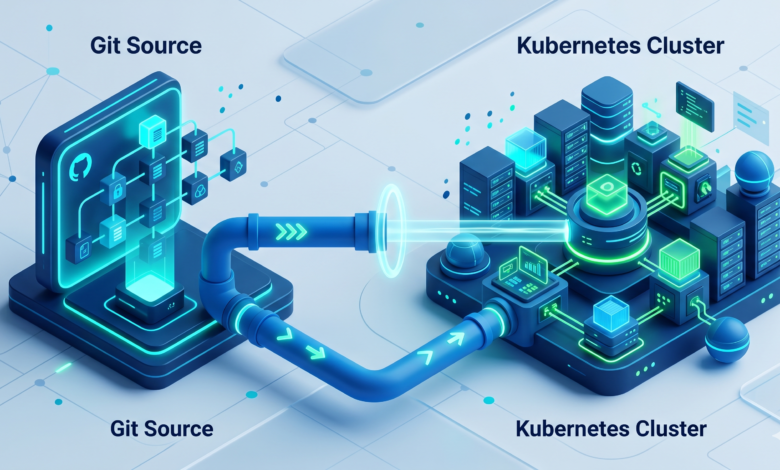
ArgoCD takes the push/CI process and changes it backwards. You no longer push your manifests to a cluster but declare your desired state through a Git repository. Inside the cluster will be an agent that continuously pulls the state you want to have/deploy, and pulls the state of the cluster every three minutes to compare the desired state and the actual state. If at any point it sees that the current actual state does not match the state you have defined in Git, it will either notify you of the difference or return the deployment back to its original intended state. Your cluster will become a “slave” to your Git repository, and you will have a complete, immutable audit trail, allowing you to “go back”…i.e., rollback…any of your changes by simply reverting a commit.
There is also a decoupling effect between the required credentials for deploying to a cluster versus those of the CI system. A CI system should never require kubernetes-admin permissions in order to deploy your application. Only through your deployment tool —ArgoCD — will anyone have those permissions, and you will need to lock down who has access to the Git repository. This is the true security boundary that I was looking for after last year’s 3 a.m. incident.
Key Components of the Control Plane
The key component for declarative kubernetes deployments using argocd is the Application CRD, which maps the Git source to the destination cluster/namespace and allows you to define the desired synchronization behavior.A simplified example illustrating the essential mapping of source and destination is shown below:
apiVersion: argoproj.io/v1alpha1
kind: Application
metadata:
  name: guestbook
spec:
  project: default
  source:
    repoURL: https://github.com/argoproj/argocd-example-apps.git  # <-- Git repository with the manifests
    targetRevision: HEAD
    path: guestbook
  destination:
    server: https://kubernetes.default.svc                    # <-- Target cluster (can be local or remote)
    namespace: guestbook
  syncPolicy:
    automated:
      prune: true      # Removes resources that disappear from Git
      selfHeal: true   # Reverts manual changes in the cluster
This is an example of creating a single source of truth by indicating to ArgoCD that the Git repository at repoURL will be the only source of truth for the guestbook namespace on this cluster, and therefore what the manifests located in that path represent. The self-heal flag is what could have saved my hotfix that night; if someone had gone straight to the Deployment and made a change that didn’t go through Git, ArgoCD would have reverted it within minutes.
GitOps Repo Structure Best Practices and Prerequisites
Infrastructure and Cluster Requirements
You will need to ensure your cluster can handle the lightweight nature of ArgoCD before you start the deployment process. The control plane consists of three micro-services (Application Controller, Repo Server, and API) and utilises approximately 1 CPU and 2 GB of RAM under moderate load. However, you should give the control plane sufficient headroom on the node you deploy it on to allow for growth.
kubectl cluster-info
Kubernetes control plane is running at https://192.168.1.100:6443
CoreDNS is running at https://192.168.1.100:6443/api/v1/namespaces/kube-system/services/kube-dns:dns/proxy

# Make sure you have at least:
# - 2 worker nodes (so ArgoCD can reschedule if a node dies)
# - 2 vCPUs and 4GB RAM free across the cluster
# - A StorageClass that supports ReadWriteOnce volumes (for the repo server cache)
The cluster-info dump will verify that you are directed to the appropriate control plane. The greatest limitation you will have is cluster capacity; if your cluster currently uses more than 90% of its capacity, the ArgoCD Controllers will return context deadline exceeded error messages as they attempt to reconcile hundreds of Applications. Scale your cluster before deploying ArgoCD.
Segregating App Code from Environment Manifests
An additional best practice in GitOps Repo Structure is the separation of the application source code from Environment Manifests. Manifests describe where and how the application is running; it is essential that you maintain separate branches for each.Mixing them often leads to rebuilding a container image just to change the memory limit, which breaks the promise of immutable artifacts.
I maintain a separate GitOps repository for my environment manifest files, while all my application code is kept in a repository itself (a monorepo with a very strict .gitignore). My directory structure looks like this:
gitops-config/
├── apps/
│   └── payment-service/
│       ├── base/
│       │   ├── deployment.yaml
│       │   ├── service.yaml
│       │   └── kustomization.yaml
│       └── overlays/
│           ├── staging/
│           │   ├── replica-count.yaml
│           │   └── kustomization.yaml
│           └── production/
│               ├── replica-count.yaml
│               └── kustomization.yaml
├── infrastructure/
│   ├── ingress-nginx/
│   └── cert-manager/
└── clusters/
    ├── staging-cluster/
    │   └── apps.yaml        # ArgoCD Application that points to overlays/staging
    └── production-cluster/
        └── apps.yaml        # Points to overlays/production
In my base folder, I keep the common Deployment and Service resources. I then overlay them with environment specific configurations (eg Replica Count, Ingress Host, Resource Limits). The Application CR (Custom Resource) for ArgoCD resides in the clusters/ sub-directory and points directly to the Overlay folders, so when I commit a change to an Overlay, it only triggers a Synchronization on that specific environment. Isolated changes avoid unnecessary late night Slack threads of “Who changed staging?!?”.
How to Install ArgoCD Kubernetes GitOps Synchronization
Creating the Dedicated Namespace
Keep it clean. Do not install ArgoCD under default or kube-system, but rather create a new namespace specifically for ArgoCD.
kubectl create namespace argocd
namespace/argocd created
If your cluster has enforced network policies, you will need to allow for egress traffic from the ArgoCD namespace to your Git server and eventually to the OIDC provider. Waiting until you have created the namespace is best to do this.
Applying the Upstream Manifests
I find that the quickest way to bootstrap is to use the raw install manifest located at the root of the stable branch, so that I do not accidentally pull down a release candidate.
kubectl apply -n argocd -f https://raw.githubusercontent.com/argoproj/argo-cd/stable/manifests/install.yaml
customresourcedefinition.apiextensions.k8s.io/applications.argoproj.io created
customresourcedefinition.apiextensions.k8s.io/appprojects.argoproj.io created
...
deployment.apps/argocd-repo-server created
deployment.apps/argocd-server created
statefulset.apps/argocd-application-controller created
networkpolicy.networking.k8s.io/argocd-server-network-policy created
Be patient while the pods come up; you can see this by running “kubectl -n argocd get pods -w”.By default, the argocd-server will expose its API and UI via a ClusterIP Service, although a transition to use of Helm-based approaches will adjust this configuration.
Fetching the Initial Admin Password
When installing ArgoCD, a secret named argocd-initial-admin-secret is created which contains an initial admin password. You can retrieve this password as follows:
kubectl -n argocd get secret argocd-initial-admin-secret -o jsonpath="{.data.password}" | base64 -d; echo
cHdhxK9d8s2N3VkJ
After the installation has been completed, use this password along with the username admin to access either the ArgoCD CLI or UI. Be sure to change the password as soon as possible if running in a cluster environment with multiple users.
Why I Ultimately Chose This Route
As mentioned before, I briefly considered going straight to the Helm Chart, however using the raw manifests gave me an easy backup strategy should anything go wrong with the Helm Release (e.g. if I messed up my values file), since the base deployment is still operational due to it being instantiated as a Kubernetes resource (object), even if I do not have the Helm Chart necessarily configured. I also can switch over to using Helm anytime by simply adopting the resources created from the raw install.
Finally, since the raw installation is also the reference installation found in the official getting started guide, it only made sense to build everything around that installation while resolving some of the early questions from the community that were assuming that base deployment.
ArgoCD Helm Chart Deployment and Enterprise Integrations
Managing ArgoCD via Helm Values
After the namespace has been established via the raw install (unless you are starting with Helm from scratch), you can now use the Helm Chart for managing the ArgoCD’s day 2 Operations. The Helm Chart provides an easier way for you to manage where and how your ArgoCD server is deployed including ingress control, resource limits, and HA configurations.The complete reference for the information can be found at Artifact Hub; however, I expose my minimal override for the UI as follows:
# values-override.yaml
server:
  service:
    type: LoadBalancer   # Or NodePort if you're bare-metal
  ingress:
    enabled: true
    annotations:
      kubernetes.io/ingress.class: nginx
      cert-manager.io/cluster-issuer: letsencrypt-prod
    hosts:
      - argocd.example.com
    tls:
      - secretName: argocd-tls
        hosts:
          - argocd.example.com
configs:
  secret:
    argocdServerAdminPassword: "$2a$10$..."  # bcrypt hash
I will install/upgrade this release using the command helm upgrade --install argocd argo/argo-cd -n argocd -f values-override.yaml. This chart controls the same Deployment and StatefulSet resources, so if you wish to migrate in place, you can use the --force option.
ArgoCD RBAC Configuration Active Directory Integration
It is not long-term viable to share the admin password. Using OpenID Connect (OIDC) allows ArgoCD to integrate directly with Active Directory (through either Azure AD or ADFS), giving the platform team access control based on existing Active Directory group memberships.
To begin the integration, create the ConfigMap named argocd-cm that contains the OIDC configuration details. Below is an example demonstrating how to connect to an Azure AD tenant:
apiVersion: v1
kind: ConfigMap
metadata:
  name: argocd-cm
data:
  url: https://argocd.example.com
  oidc.config: |
    name: AzureAD
    issuer: https://login.microsoftonline.com/XXXXXXXX-XXXX-XXXX-XXXX-XXXXXXXXXXXX/v2.0
    clientID: a1b2c3d4-...
    clientSecret: $oidc-azuread-client-secret:mySecret
    requestedScopes: ["openid", "profile", "email"]
Next, the groups are mapped to ArgoCD roles by creating the ConfigMap named argocd-rbac-cm. The mapping is done with the following field, which provides admin access to all users in the AD group platform-team, and read-only access to developers:
g, platform-team, role:admin
g, dev-team, role:readonly
The OIDC client secret is stored separately in a Secret named argocd-oidc-secret, that is referenced with the syntax $oidc-azuread-client-secret:mySecret. When SSO is activated, the LOGIN VIA OIDC button is available on the ArgoCD UI, and the RBAC policy is applied. After this is done, I completely eliminate the local admin account. The finer details of SSO configuration are covered in the ArgoCD User Management Documentation; however, this is a pattern I have successfully followed across three production clusters for over a year.
Troubleshooting ArgoCD Application Resource Sync and Edge Cases
Resolving Infinite Sync Loops from Mutating Webhooks
This nightmare was the bane of my existence for an entire Friday! My Application was going between Synced and OutOfSync every three minutes and every time I diff’d it ArgoCD told me the same thing: there was one field that was being injected into the Application via an admission webhook. In my case, the Istio sidecar injector was injecting an annotation for sidcar.istio.io/status that would generate a pod-specific hash that would change every tme ArgoCD reconciled.
The ArgoCD UI diff would show me the following, where the <– indicates the ephemeral field that keeps changing:
metadata:
  annotations:
    kubectl.kubernetes.io/last-applied-configuration: "..."
    sidecar.istio.io/status: '{"revision":"58b5c8c5...","initContainers":["istio-init"]}'  # <-- Mutated every sync
Because ArgoCD sees that the live object’s annotation is different than the manifest in Git, it deems the Application as OutOfSync, “corrects” it, and the mutating webhook changes it again right away. So, by using the ignoreDiffernce block of the Application CRD, you can tell ArgoCD to ignore this field.
Ignoring Extraneous Resource Fields
By adding the relevant ignoreDiffenece block into the Application CRD, you can configure which fields don’t interest you and want ArgoCD to ignore them when doing comparison operations. For the Istio annotation mentioned above, you would add:
spec:
  ignoreDifferences:
  - group: apps
    kind: Deployment
    jsonPointers:
    - /metadata/annotations/sidecar.istio.io~1status
Note that the ~1 in the JSON patch escape allows you to escape a forward slash. You also have the capability of ignoring entire resource status fields and also standard labels added by admission controllers. After applying, the application goes back to Healthy status and stays there. Remember to use the -vvv flag on argocd app diff to identify these fields sooner rather than later.
Triggering Automated Rollback ArgoCD Post-Failure
ArgoCD doesn’t have a feature to automatically roll back a deployment if it encounters issues, as some CI servers do. However, with a little configuration you can create an automated restoration process in ArgoCD using a combination of health checks and retries. When a synchronization fails (e.g., a newly deployed application fails to start and enters “CrashLoopBackOff”), ArgoCD will mark that deployment as “Degraded” (or Unhealthy). If the application’s recovery mode is enabled, reverting the last synchronization is easy; simply push the new commit to the Git repository and ArgoCD will pull it down.
Another way to recover from failures in ArgoCD is to leverage its built-in mechanism for retries. The ability to retry synchronization from ArgoCD is useful after temporary failures, such as a failure due to a CRD that has not yet finished setting up. Here is an example of a retry policy that will retry three times with a five-second wait between tries:
syncPolicy:
  automated:
    prune: true
    selfHeal: true
    allowEmpty: false
  retry:
    limit: 3
    backoff:
      duration: 5s
      factor: 2
      maxDuration: 3m
Although this type of retry process does not undo the original “bad” deployment, it can be very effective for resolving issues caused by race conditions. For automated recovery, I rely on a separate GitOPS operator or a simple shell script that monitors the health statuses for ArgoCD applications. The script then runs the “git revert” command and pushes the changes back out to the origin repository. I utilize this script in conjunction with a small cron job that executes every 5 minutes to scan ArgoCD for any degraded applications. The job checks each application’s last commit, and if it finds one that caused the degraded state, it reverts it to the last known good commit. This is not a perfect solution, but in a production environment it can be reliable if adequately tested. For additional information regarding ArgoCD sync policies, refer to the sync policy documentation.
Frequently Asked Questions
How do I keep secrets safe when using a public GitOps repository?
You should never check secrets in plaintext format into Git. Instead, it is recommended that you use a solution such as Sealed Secrets, External Secrets Operator, or HashiCorp Vault to store your secrets. A secret can be encrypted using Sealed Secrets, and then the SealedSecret Custom Resource Definition (CRD) will be committed to your GitOps repository. The cluster controller will decrypt the secret using Sealed Secrets and then convert it into a normal Kubernetes Secret in your cluster. Therefore, the public Git repository only contains the encrypted version of the secret. If you are utilizing AWS, the External Secrets Operator will connect to the AWS Secrets Manager directly, and so the secret itself will never actually be present in Git.
Can ArgoCD manage deployments across multiple external Kubernetes clusters?
Yes, this is a well-known pattern of usage with ArgoCD. To enable deployment to external clusters, you need to add your external clusters to your instance of ArgoCD by executing the command argocd cluster add. Once the cluster is added to ArgoCD, you are able to deploy Applications managed within ArgoCD to any of the added remote clusters. You will need to specify the remote destination cluster by entering the API server URL or Cluster Name while defining the Application. Our company has a single ArgoCD hub, which manages deployments to a Staging Cluster and three Production Clusters. Having one ArgoCD hub to manage multiple clusters allows for easier management and less overhead since all ArgoCD instances are not independent.
Why does my Application remain in the “Progressing” state instead of the “Healthy” state?
A common reason for the Application being stuck in the “Progressing” state is that one of the Kubernetes resources (e.g., Deployment, StatefulSet, DaemonSet) has not met the configured desired count of replicas or the resource is failing a health check. To understand why the Application is in the “Progressing” state, run the command argocd app get --refresh, and view the resource tree to see the details. You may also want to check the events for the pods in question by executing the command kubectl describe pod -n . If the Deployment meets its deadline but the Application has still not progressed to the “Healthy” state, ArgoCD will eventually transition it to the “Degraded” state and notify you that the Application experienced a sync failure. The main reasons why an Application may remain in the “Progressing” state are due to: (1) the cluster being under-provisioned; (2) the use of incorrect image tags; (3) readiness checks failing (e.g., failing because the Pod has not yet started). Therefore, do not attempt to troubleshoot the ArgoCD status, but instead focus your troubleshooting efforts on resolving the issue associated with the reason the Pods are in the unroutable state. Remember that the ArgoCD sync status simply reflects the Kubernetes health status.